Bandsaw Welder Instruction Manual

This portable blade welder can cut, weld, anneal, and grind bandsaw blades, which is commonly done in. Edly moves during operation, burns, lacerations,. 20-inch Metalworking Band Saw Model VBS-2012 JET 427 New Sanford Road LaVergne, Tennessee 37086 Part No. 12.3 Welding.
. BANDSAW BLADE WELDERModel 3663Set up And Operating InstructionsDiagrams within this manual may not be drawn proportionally.Due to continuing improvements, actual product may differ slightly from the product described herein.Distributed exclusively by Harbor Freight Tools®.3491 Mission Oaks Blvd., Camarillo, CA 93011Visit our website at: Read this material before using this product.Failure to do so can result in serious injury.
Save this manual. SpecificationsPower RequirementsWelding CurrentWelding Blade SizesMaximum Jaw Movement220 V, 1-Phase, 60 Hz, 6 A( Only use on a 20 amp circuit)280 A1/8” to 1/2”.137”Note: Grinder not included.Note: Performance of this tool (if powered by line voltage) may vary depending on variationsin local line voltage. Extension cord usage may also affect tool performance. Inhalation HazardWelding/Plasma Cutting Produces toxic fumes and gasses.
Exposure to welding or cutting gasses can increase the risk ofdeveloping certain cancers, such as cancer of the larynx andlung cancer. Use proper size and type extension cord. If an extension cord is required, it must be of theproper size and type to supply the correct current to the tool without heating up. Otherwise, theextension cord could melt and catch fire, or cause electrical damage to the tool. This tool requires use of an extension cord of 20 amps capability (up to 50 feet), with wire size rated at 12AWG.
Longer extension cords require larger size wire. OperationThis Bandsaw Blade Welder is used to weld saw blades between 1/8 and 1/2 inches in width.Additional Warnings!1. Make sure the Welding and Annealing Buttons are not depressed before plugging in the unit.2.
Never leave the welder unattended while running.3. Always unplug before servicing. All internal maintenance should be performed by an authorizedservice technician.4.
Sparks are generated while welding. Situate the welder far away from any flammablematerials. Loosen both of the clamp handles (Left Hand Clamp (14) and Right Hand Clamp (6)). See Figure 3.4.
Place one end of the saw blade (not included) under the Left Electrode (13). See Figure 4on page 6. Make sure it is aligned squarely and the teeth are facing back. The saw blade endshould protrude 1/4” out of the clamp, toward the center.Figure 4Figure 55. Tighten the Left Hand Clamp (14).
See Figure 4.6. Annealing the WeldNote: The annealing process tempers and toughens the blade, reducing brittleness.1. Retighten the Right Hand Clamp (6). See Figure 7.2. Press and hold the red Annealing Button (11) until the bladebecomes dark red. Release the Annealing Button (11) aftera few seconds.3. Repeat pressing and releasing (pulsating action) the Annealing Button (11) (while reducing the annealing time)several times until the redness is no longer visible.4.
MaintenanceWARNING! Unplug welder before performing any maintenance.1. When not in use, cover and store the Welder in a clean, dry location.2. Periodically, open and use fine grit sandpaper to clean the carbon residue from the inside surfaces of the terminal clamps.3. Always unplug before servicing. All internal maintenance should be performed by a qualifiedservice technician.Wiring DiagramREV 04fSKU 3663For technical questions, please call 1-800-444-3353.
Front Panel Parts List and DiagramPartDescriptionPartDescriptionPartDescription1Handle6Right Hand Clamp14Left Hand Clamp2Light Mantle10Case15Light Switch3Base Frame11Annealing Button16Line Cord (without plug)4Welding Button12Pressure Knob5Right Electrode13Left ElectrodePLEASE READ THE FOLLOWING CAREFULLYTHE MANUFACTURER AND/OR DISTRIBUTOR HAS PROVIDED THE PARTS DIAGRAM IN THIS MANUAL AS AREFERENCE TOOL ONLY. Parts ListPartDescriptionPartDescription1Ringent Circle27Bolt2Defection Axes28Spring Washer3Cover of Deflection Axes29Washer4Left Electrode30Base of Spring5Right Electrode31Base of Spot Switch6Lamp32Spot Switch7Lamp Holder33Connection8Lamp Shield34Base of Connection9Nut35Main Transformer10Knob36Nut11Bolt37Spring Washer12Nameplate38Washer13Panel39Support Shelf of Transformer14Red Button40Bol. Assembly DrawingREV 04f; 08aSKU 3663For technical questions, please call 1-800-444-3353. Limited 1 Year / 90 day warrantyHarbor Freight Tools Co.
Makes every effort to assure that its products meet high quality anddurability standards, and warrants to the original purchaser that for a period of ninety days from date ofpurchase that the torch, liner, wire feed mechanism (if applicable), welding clamps, electrode holders,cables and accessories packed with the welder are free of defects in materials and workmanship.
. BANDSAW BLADE WELDER Model 3663 SEt up AND OpERAtiNg iNStRuctiONS Diagrams within this manual may not be drawn proportionally. Due to continuing improvements, actual product may differ slightly from the product described herein. Distributed exclusively by Harbor Freight tools ®. Protective, electrically non-conductive clothes and non-skid footwear are recommended when working. Wear restrictive hair covering to contain long hair. Always wear heavy-duty leather gloves when handling bandsaw blades.
REV 07j SKU 3663 For technical questions, please call 1-800-444-3353. Read warning labels if tak- ing prescription medicine to determine if your judgement or reflexes are impaired while taking drugs. If there is any doubt, do not operate the Welder. SKU 3663 For technical questions, please call 1-800-444-3353. See the wiring diagram on page 8. FiguRE 1 Light Welding Button Annealing Button Pressure Knob Right Electrode Left Electrode Power Cord Right Hand Clamp Left Hand Clamp Light Switch REV 04e, 04f, 07k SKU 3663 For technical questions, please call 1-800-444-3353.
User Manual
Turn the Pressure Knob (12) to zero. See FIGURE 2.
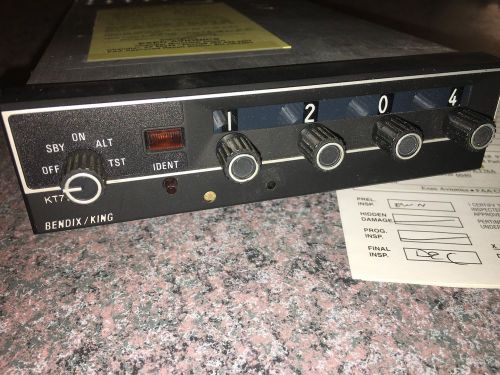 I get a really good bright reply light when I press the ident button. Problem is I don't want to spend much on a repair of a $500 box. I may take you up on that Walt. I think the tube is good if what Gil says is true.
When the Pressure Knob (12) is turned to zero, the Right Electrode (5) will separate from the Left Electrode (13). REV 04f SKU 3663 For technical questions, please call 1-800-444-3353. With the Welding Button (4) still pressed, loosen the Right Hand Clamp (6) and turn the Pres- sure Knob (12) counterclockwise to zero. Then, release the Welding Button (4). See FIGURE 6. FiguRE 6 REV 04f, 07k SKU 3663 For technical questions, please call 1-800-444-3353.
Century 100 Welder Instruction Manual
Run the saw for 2-3 minutes. Then, stop the saw, unplug it, and check the weld visually before you begin cutting an actual workpiece. Do not continue if the weld shows signs of cracking or breaking. REV 04f SKU 3663 For technical questions, please call 1-800-444-3353. Periodically, open and use fine grit sandpaper to clean the carbon residue from the inside sur- faces of the terminal clamps.

Always unplug before servicing. All internal maintenance should be performed by a qualified service technician. Wiring Diagram REV 04f SKU 3663 For technical questions, please call 1-800-444-3353.
THE ORIGINAL PRODUCT OR REPLACEMENT PARTS THERETO, OR ARISING OUT OF HIS OR HER INSTAL- LATION OF REPLACEMENT PARTS THERETO. Note: Some parts are listed and shown for illustration purposes only and are not available individually as replacement parts. REV 04f, 07k SKU 3663 For technical questions, please call 1-800-444-3353. Iron Wedge Deflection Wheel Copper Block Washer Axes Bolt Spring Washer Label Button Switch Batten Nail Bolt Connection Piece Short Spring Copper Pressure Block Long Spring Handle REV 04f; 08a SKU 3663 For technical questions, please call 1-800-444-3353. ASSEMBLy DRAWiNg REV 04f; 08a SKU 3663 For technical questions, please call 1-800-444-3353. This warranty gives you specific legal rights and you may also have other rights which vary from state to state.
3491 Mission Oaks Blvd. PO Box 6009. Camarillo, CA 93011. (800) 444-3353 SKU 3663 For technical questions, please call 1-800-444-3353.